

Type DeadSpace
Target Kill all NPC's
Steps 3
Mission briefing
I have terrible news, ***. A major personel convoy carrying countless Amarr Empire members was completely obliterated by Sansha's fighters, led by that damned commander of theirs, Draben Kuvakei. His reputation as a brutal Sansha military leader has traveled far and wide these past few years, and it's time to put and end to his miserable existance.
I want to you be the bringer of our vengeance, ***. Strike him down like the dog he is. When his battleship has been turned to dust, then you shall recieve your reward.

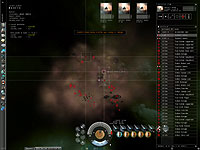
Step Type warp
Number of Spawns 6
NPC's Attack after warp yes
Your Shield/Armor resists ![]()
![]()
![]()
Your Damage type ![]()
Structures with loot Power Generator
| Spawn # 1 | |||||||||||||||||||||
|---|---|---|---|---|---|---|---|---|---|---|---|---|---|---|---|---|---|---|---|---|---|
| Name | Bounty($) | orb. | vel. | ||||||||||||||||||
 |
3 × Sansha's Demon | 30 000 | 17 | 0 | 0 | 20 | 525 | 0 | 60 | 40 | 20 | 6000 | 900 | 1 | + | — | — | — | — | ||
| — | 350 | 0 | 60 | 40 | 20 | ||||||||||||||||
 |
2 × Centus Mutant Lord | 487 500 | 56 | 0 | 0 | 56 | 3975 | 0 | 60 | 40 | 20 | 14000 | 750 | — | — | — | — | — | — | ||
| 469 | 0 | 0 | 0 | 5500 | 0 | 60 | 40 | 20 | |||||||||||||
| Spawn # 2 | |||||||||||||||||||||
|---|---|---|---|---|---|---|---|---|---|---|---|---|---|---|---|---|---|---|---|---|---|
| Name | Bounty($) | orb. | vel. | ||||||||||||||||||
 |
3 × Centus Savage Lord | 543 750 | 144 | 0 | 0 | 144 | 4250 | 0 | 60 | 40 | 20 | 38000 | 500 | — | — | — | — | — | — | ||
| 0 | 0 | 375 | 0 | 6750 | 0 | 60 | 40 | 20 | |||||||||||||
| Spawn # 3 | |||||||||||||||||||||
|---|---|---|---|---|---|---|---|---|---|---|---|---|---|---|---|---|---|---|---|---|---|
| Name | Bounty($) | orb. | vel. | ||||||||||||||||||
 |
1 × Centii Butcher | 9 000 | 23 | 0 | 0 | 19 | 250 | 0 | 60 | 40 | 20 | 11000 | 325 | — | — | — | — | — | — | ||
| — | 300 | 0 | 60 | 40 | 20 | ||||||||||||||||
 |
3 × Centum Slaughterer | 57 188 | 28 | 0 | 0 | 22 | 1050 | 0 | 60 | 40 | 20 | 7250 | 500 | — | — | — | + | — | — | ||
| 83 | 0 | 0 | 0 | 1400 | 0 | 60 | 40 | 20 | |||||||||||||
 |
1 × Centum Execrator | 62 813 | 48 | 0 | 0 | 38 | 1100 | 0 | 60 | 40 | 20 | 19000 | 375 | — | — | — | + | — | — | ||
| — | 1500 | 0 | 60 | 40 | 20 | ||||||||||||||||
 |
1 × True Centum Slaughterer | 65 625 | 34 | 0 | 0 | 28 | 1050 | 0 | 60 | 40 | 20 | 7250 | 500 | — | — | — | + | — | — | ||
| 83 | 0 | 0 | 0 | 1400 | 0 | 60 | 40 | 20 | |||||||||||||
 |
4 × True Centii Enslaver | 8 625 | 11 | 0 | 0 | 9 | 175 | 0 | 60 | 40 | 20 | 5500 | 250 | — | — | — | — | — | — | ||
| 83 | 0 | 0 | 0 | 250 | 0 | 60 | 40 | 20 | |||||||||||||
 |
1 × True Centum Juggernaut | 60 000 | 48 | 0 | 0 | 48 | 1000 | 0 | 60 | 40 | 20 | 19000 | 375 | — | — | — | + | — | — | ||
| — | 1250 | 0 | 60 | 40 | 20 | ||||||||||||||||
| Spawn # 4 | |||||||||||||||||||||
|---|---|---|---|---|---|---|---|---|---|---|---|---|---|---|---|---|---|---|---|---|---|
| Name | Bounty($) | orb. | vel. | ||||||||||||||||||
 |
5 × Centum Ravager | 43 125 | 24 | 0 | 0 | 24 | 700 | 0 | 60 | 40 | 20 | 5750 | 375 | — | — | — | — | — | — | ||
| — | 875 | 0 | 60 | 40 | 20 | ||||||||||||||||
| Spawn # 5 | |||||||||||||||||||||
|---|---|---|---|---|---|---|---|---|---|---|---|---|---|---|---|---|---|---|---|---|---|
| Name | Bounty($) | orb. | vel. | ||||||||||||||||||
|
1 × Centus Mutant Lord | 487 500 | 56 | 0 | 0 | 56 | 3975 | 0 | 60 | 40 | 20 | 14000 | 750 | — | — | — | — | — | — | ||
| 469 | 0 | 0 | 0 | 5500 | 0 | 60 | 40 | 20 | |||||||||||||
|
2 × Centum Ravager | 43 125 | 24 | 0 | 0 | 24 | 700 | 0 | 60 | 40 | 20 | 5750 | 375 | — | — | — | — | — | — | ||
| — | 875 | 0 | 60 | 40 | 20 | ||||||||||||||||
| Spawn # 6 | |||||||||||||||||||||
|---|---|---|---|---|---|---|---|---|---|---|---|---|---|---|---|---|---|---|---|---|---|
| Name | Bounty($) | orb. | vel. | ||||||||||||||||||
|
2 × True Centum Slaughterer | 65 625 | 34 | 0 | 0 | 28 | 1050 | 0 | 60 | 40 | 20 | 7250 | 500 | — | — | — | + | — | — | ||
| 83 | 0 | 0 | 0 | 1400 | 0 | 60 | 40 | 20 | |||||||||||||
|
3 × True Centum Juggernaut | 60 000 | 48 | 0 | 0 | 48 | 1000 | 0 | 60 | 40 | 20 | 19000 | 375 | — | — | — | + | — | — | ||
| — | 1250 | 0 | 60 | 40 | 20 | ||||||||||||||||
 |
1 × True Centus Savage Lord | 937 500 | 180 | 0 | 0 | 180 | 4250 | 0 | 60 | 40 | 20 | 38000 | 500 | — | — | — | — | — | — | ||
| 0 | 0 | 375 | 0 | 6750 | 0 | 60 | 40 | 20 | |||||||||||||
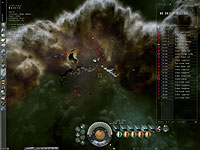
Step Type warp
Number of Spawns 4
NPC's Attack after warp yes
Your Shield/Armor resists ![]()
![]()
![]()
Your Damage type ![]()
Structures with loot Sansha Storage Facility
| Spawn # 1 | |||||||||||||||||||||
|---|---|---|---|---|---|---|---|---|---|---|---|---|---|---|---|---|---|---|---|---|---|
| Name | Bounty($) | orb. | vel. | ||||||||||||||||||
 |
1 × Centum Beast | 45 938 | 20 | 0 | 0 | 20 | 800 | 0 | 60 | 40 | 20 | 7250 | 500 | — | — | — | + | — | — | ||
| 83 | 0 | 0 | 0 | 1000 | 0 | 60 | 40 | 20 | |||||||||||||
 |
1 × Centii Loyal Ravener | 21 375 | 12 | 0 | 0 | 12 | 325 | 0 | 60 | 40 | 20 | 4375 | 750 | 2 | + | — | — | — | — | ||
| 33 | 0 | 0 | 0 | 850 | 0 | 60 | 40 | 20 | |||||||||||||
|
1 × Centus Savage Lord | 543 750 | 144 | 0 | 0 | 144 | 4250 | 0 | 60 | 40 | 20 | 38000 | 500 | — | — | — | — | — | — | ||
| 0 | 0 | 375 | 0 | 6750 | 0 | 60 | 40 | 20 | |||||||||||||
 |
1 × True Centum Ravager | 48 750 | 30 | 0 | 0 | 30 | 700 | 0 | 60 | 40 | 20 | 5750 | 375 | — | — | — | — | — | — | ||
| — | 875 | 0 | 60 | 40 | 20 | ||||||||||||||||
| Spawn # 2 | |||||||||||||||||||||
|---|---|---|---|---|---|---|---|---|---|---|---|---|---|---|---|---|---|---|---|---|---|
| Name | Bounty($) | orb. | vel. | ||||||||||||||||||
|
1 × Centus Savage Lord | 543 750 | 144 | 0 | 0 | 144 | 4250 | 0 | 60 | 40 | 20 | 38000 | 500 | — | — | — | — | — | — | ||
| 0 | 0 | 375 | 0 | 6750 | 0 | 60 | 40 | 20 | |||||||||||||
 |
2 × True Centus Lord | 600 000 | 65 | 0 | 0 | 65 | 3250 | 0 | 60 | 40 | 20 | 14000 | 750 | — | — | — | — | — | — | ||
| 469 | 0 | 0 | 0 | 4250 | 0 | 60 | 40 | 20 | |||||||||||||
| Spawn # 3 | |||||||||||||||||||||
|---|---|---|---|---|---|---|---|---|---|---|---|---|---|---|---|---|---|---|---|---|---|
| Name | Bounty($) | orb. | vel. | ||||||||||||||||||
|
1 × Centum Slaughterer | 57 188 | 28 | 0 | 0 | 22 | 1050 | 0 | 60 | 40 | 20 | 7250 | 500 | — | — | — | + | — | — | ||
| 83 | 0 | 0 | 0 | 1400 | 0 | 60 | 40 | 20 | |||||||||||||
 |
2 × Centum Juggernaut | 51 563 | 38 | 0 | 0 | 38 | 1000 | 0 | 60 | 40 | 20 | 19000 | 375 | — | — | — | + | — | — | ||
| — | 1250 | 0 | 60 | 40 | 20 | ||||||||||||||||
 |
3 × True Centum Beast | 54 375 | 25 | 0 | 0 | 25 | 800 | 0 | 60 | 40 | 20 | 7250 | 500 | — | — | — | + | — | — | ||
| 83 | 0 | 0 | 0 | 1000 | 0 | 60 | 40 | 20 | |||||||||||||
| Spawn # 4 | |||||||||||||||||||||
|---|---|---|---|---|---|---|---|---|---|---|---|---|---|---|---|---|---|---|---|---|---|
| Name | Bounty($) | orb. | vel. | ||||||||||||||||||
|
3 × Centum Slaughterer | 57 188 | 28 | 0 | 0 | 22 | 1050 | 0 | 60 | 40 | 20 | 7250 | 500 | — | — | — | + | — | — | ||
| 83 | 0 | 0 | 0 | 1400 | 0 | 60 | 40 | 20 | |||||||||||||
|
1 × Centum Juggernaut | 51 563 | 38 | 0 | 0 | 38 | 1000 | 0 | 60 | 40 | 20 | 19000 | 375 | — | — | — | + | — | — | ||
| — | 1250 | 0 | 60 | 40 | 20 | ||||||||||||||||
|
2 × Centus Mutant Lord | 487 500 | 56 | 0 | 0 | 56 | 3975 | 0 | 60 | 40 | 20 | 14000 | 750 | — | — | — | — | — | — | ||
| 469 | 0 | 0 | 0 | 5500 | 0 | 60 | 40 | 20 | |||||||||||||
|
1 × True Centum Beast | 54 375 | 25 | 0 | 0 | 25 | 800 | 0 | 60 | 40 | 20 | 7250 | 500 | — | — | — | + | — | — | ||
| 83 | 0 | 0 | 0 | 1000 | 0 | 60 | 40 | 20 | |||||||||||||
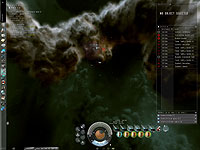
Step Type warp
Number of Spawns 2
NPC's Attack after warp no
Your Shield/Armor resists ![]()
![]()
![]()
Your Damage type ![]()
Structures with loot Sansha's Battletower
| Spawn # 1 | |||||||||||||||||||||
|---|---|---|---|---|---|---|---|---|---|---|---|---|---|---|---|---|---|---|---|---|---|
| Name | Bounty($) | orb. | vel. | ||||||||||||||||||
|
2 × Sansha's Demon | 30 000 | 17 | 0 | 0 | 20 | 525 | 0 | 60 | 40 | 20 | 6000 | 900 | 1 | + | — | — | — | — | ||
| — | 350 | 0 | 60 | 40 | 20 | ||||||||||||||||
 |
1 × Sansha's Berserker | 25 000 | 14 | 0 | 0 | 17 | 300 | 0 | 60 | 40 | 20 | 6000 | 500 | 1 | + | — | — | — | — | ||
| — | 550 | 0 | 60 | 40 | 20 | ||||||||||||||||
 |
1 × True Centus Mutant Lord | 825 000 | 70 | 0 | 0 | 70 | 3975 | 0 | 60 | 40 | 20 | 14000 | 750 | — | — | — | — | — | — | ||
| 469 | 0 | 0 | 0 | 5500 | 0 | 60 | 40 | 20 | |||||||||||||
 |
1 × Draben Kuvakei | 2 500 000 | 118 | 0 | 0 | 142 | 4250 | 0 | 60 | 40 | 20 | 40000 | 290 | — | — | — | — | — | — | ||
| 0 | 0 | 638 | 0 | 6750 | 0 | 60 | 40 | 20 | |||||||||||||
| Spawn # 2 | |||||||||||||||||||||
|---|---|---|---|---|---|---|---|---|---|---|---|---|---|---|---|---|---|---|---|---|---|
| Name | Bounty($) | orb. | vel. | ||||||||||||||||||
 |
5 × Tower Sentry Sansha III | 70 000 | 72 | 128 | 24 | 120 | 1000 | 0 | 60 | 40 | 20 | 0 | — | — | — | — | — | — | — | ||
| — | 3200 | 0 | 60 | 40 | 20 | ||||||||||||||||
Then re-warp and just fly to Draben Kuvakei at 14 km and fire. After 3 min he was died. Nothing special in loot: gun , smart and nosf.
My setup:
High: Mega Modulated Pulse Energy Beam I x 7, Tracktor Beam
Med: F-b10 Cap x 3, Optical Comp (named Track Enhancer)
Low: Energiz Membrane II, EM & Termal Hardn II, Heat Sink II, Cap I, Large Rerp II, Damage Control (named)
High Slots: 5 mega pulse 2's, 2 heavy pulse 2's, 1 tractor beam
Mid Slots: 1 100mw ab2, 1 webber, 2 cap rechargers 2
Low Slots: 1 l armor repper 2, 3 Energized adapt nano 2's, 1 em & 1 therm hardener 2's, 1 cap recharger.
STEP 1: not bad at all, most of the cruisers use some type of electronic jamming stuff, Execrators seem to be most succesful so i killed them first.
STEP 2: Same as step1. A ab is crucial if you want to get into good kill range with Multi's which are my choice, or t2 version, bs's like to keep distance so need ab to close.
STEP 3: nothing aggroed so im moved out to near max radio crystal range and hit the sentrys until other guys came into range. I killed the frigs then concentrated on the turrents since i wasnt tanked for their dmg. Never had any probs bt dont get too close to sentrys (30km) cause they can hurt. The 2.5 mil guy is easy with this setup using t2 multi's when you get into range (15km)
Blew the damn can by boss by mistake, so no drop info :(